




How to Transfer Crypto from an Exchange to a Hardware Wallet Safely

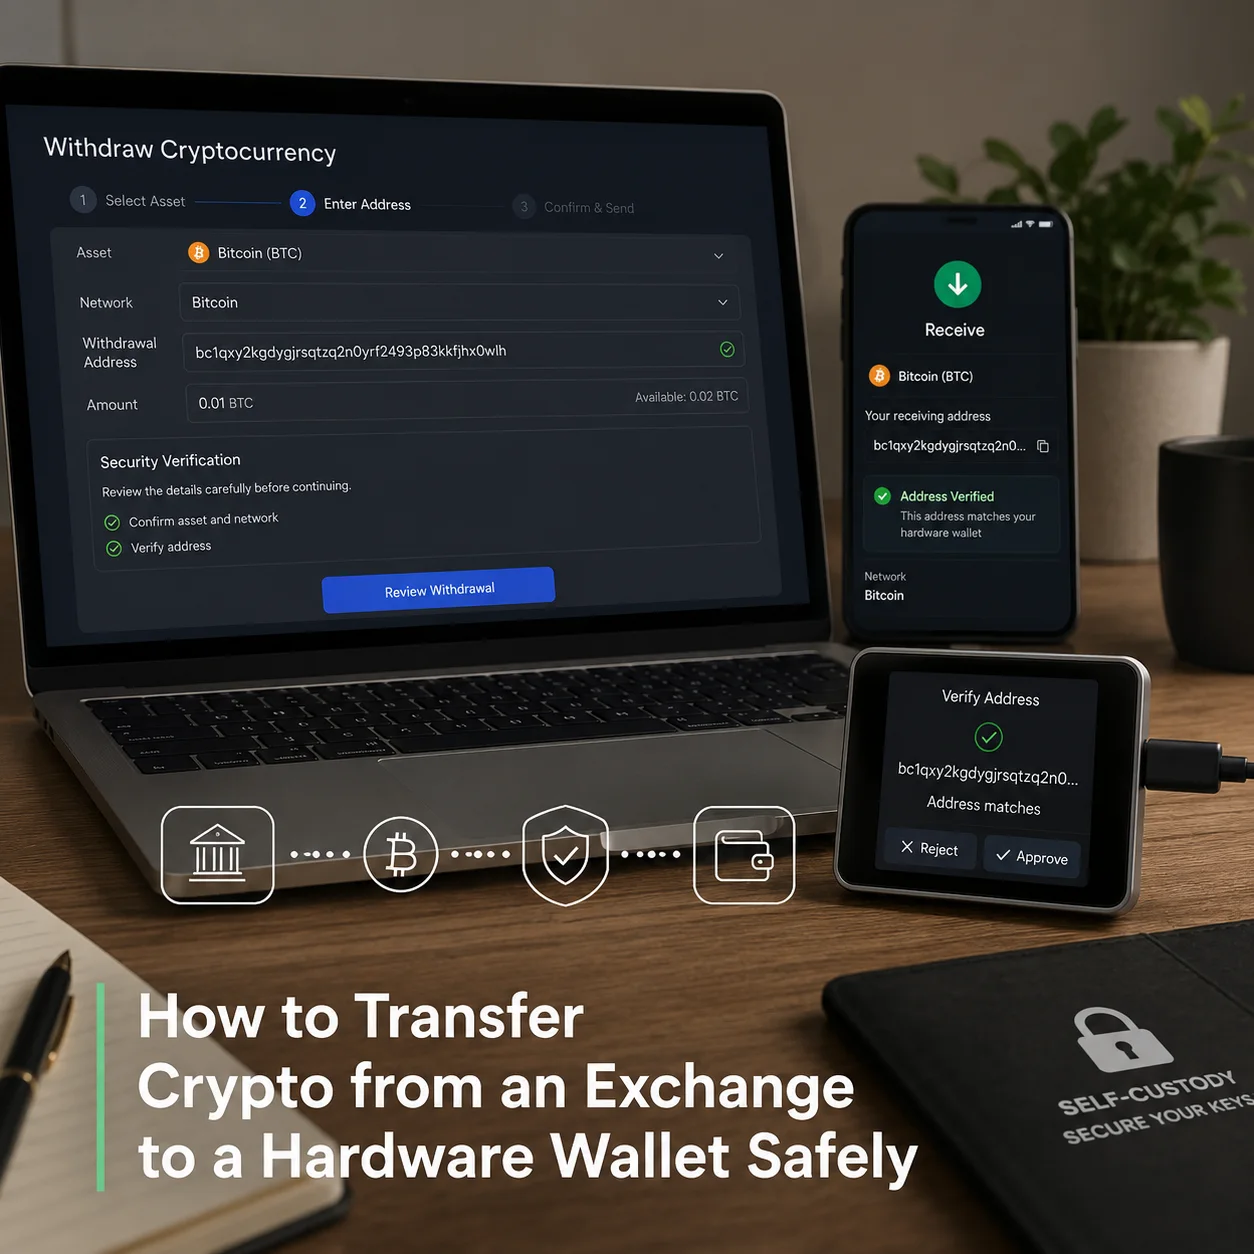
Moving cryptocurrency from an exchange to a hardware wallet is one of the most important steps in self-custody.
The process is not technically difficult. You generate a receiving address with your hardware wallet, enter that address on the exchange, select the correct blockchain network, and confirm the withdrawal.
The risk comes from the details.
A wrong network, an unverified address, malicious clipboard software, an unsupported token, or a rushed withdrawal can result in delayed access or permanent loss. Blockchain transactions are generally not designed to be reversed by an exchange after they have been confirmed.
This guide explains how to transfer crypto from an exchange to a hardware wallet safely, including the checks you should complete before, during, and after the withdrawal.
It applies to common hardware wallets such as Ledger, Trezor, and Tangem, although the exact menu names may differ between devices and exchange platforms.
Security rule: Your recovery phrase is never required to receive crypto. Do not enter it on an exchange, website, browser extension, cloud service, or support form.
Your cryptocurrency is not physically moved into the hardware wallet.
Crypto assets remain recorded on their respective blockchains. The withdrawal creates a blockchain transaction that assigns control of the assets to an address generated by your wallet.
The hardware wallet protects the private keys used to authorize future transactions from that address. The public address can be shared to receive funds, while the private key must remain secret.
This distinction matters because:
- The hardware wallet does not need to remain connected while receiving funds.
- Turning off or losing power to the device does not remove the assets from the blockchain.
- The recovery phrase can restore access on a compatible wallet if the device is lost or damaged.
- Anyone who obtains the recovery phrase may be able to recreate the wallet and control its assets.
A hardware wallet improves key isolation, but it does not automatically protect against every mistake. You still need to verify the receiving address, choose the correct blockchain network, and secure the recovery backup.
2. Before You Start: Complete These Safety Checks
Do not begin the withdrawal until the hardware wallet is properly initialized.
2.1 Initialize the Hardware Wallet Yourself
A new device should be initialized by you.
The wallet should generate a new recovery phrase during setup. Do not use a phrase supplied on a printed card, included in the packaging, sent by a seller, or provided by customer support.
A legitimate manufacturer or retailer does not need to know your recovery phrase.
If the device arrives already configured, displays an existing PIN, or includes a completed recovery card, stop using it and contact the seller through a verified channel.
2.2 Download Wallet Software from the Official Source
Use only the manufacturer’s official application or a verified compatible wallet.
Examples include:
- Ledger Wallet for supported Ledger devices
- Trezor Suite for Trezor devices
- The official Tangem mobile application for Tangem cards
Avoid software downloaded from search advertisements, unofficial mirrors, social-media messages, or links sent by strangers.
Fake wallet applications are designed to capture recovery phrases or replace receiving addresses.
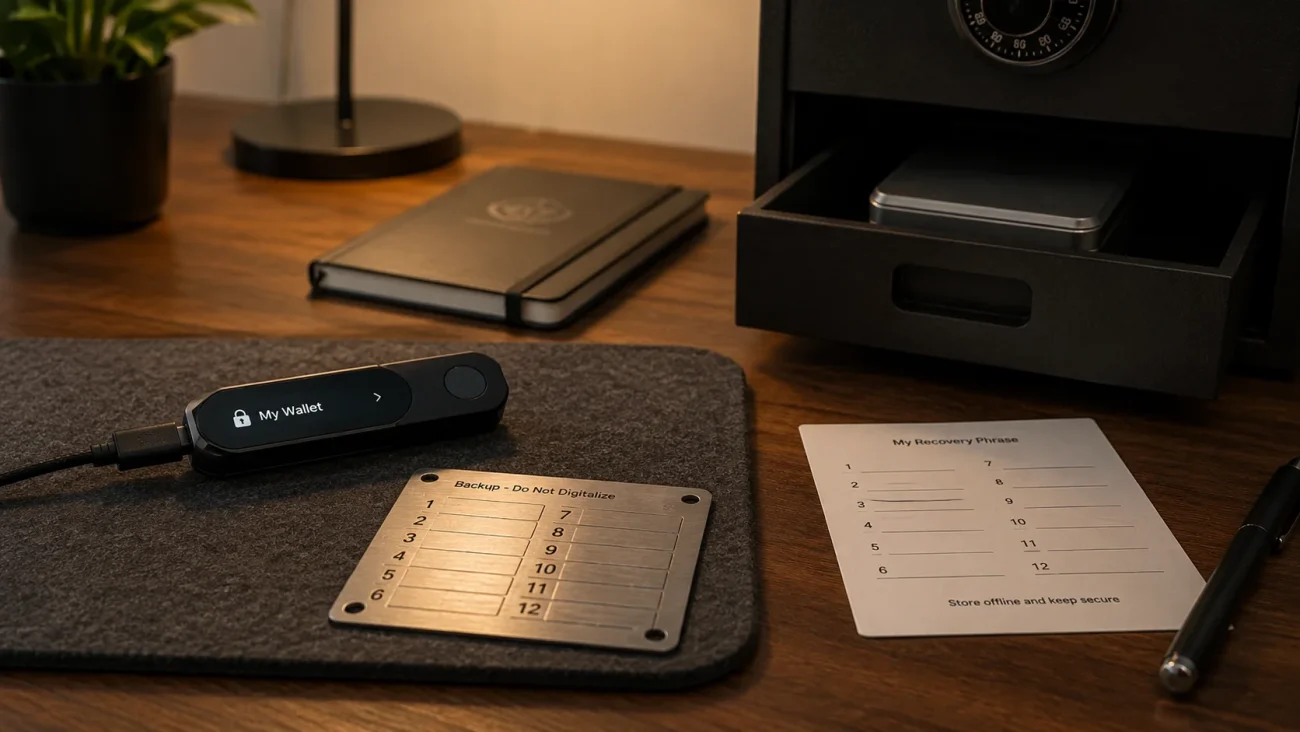
2.3 Secure the Recovery Phrase Offline
Before transferring meaningful funds, confirm that your recovery phrase is:
- Complete
- In the correct order
- Clearly readable
- Stored offline
- Separate from the hardware wallet
- Not photographed or uploaded to cloud storage
- Not saved in email, messaging apps, notes, or password managers
A paper backup can work when stored properly, but it remains vulnerable to fire, water, fading, accidental disposal, and physical deterioration.
For long-term storage, some users choose a metal seed phrase backup. A physical backup can improve resistance to environmental damage, but it still needs protection from theft and unauthorized access.
Add an internal link here to your Seed Phrase Storage category or your guide to metal recovery backups.
2.4 Update the Device Through Official Software
Check whether the hardware wallet’s official application recommends a firmware update.
Complete updates before transferring significant funds, provided that:
- The software is authentic
- The device is functioning normally
- Your recovery phrase backup has been verified
- You understand the manufacturer’s update instructions
Do not reset a working wallet or perform recovery experiments with a funded account unless you have confirmed the backup.
2.5 Confirm Asset and Network Support
A hardware wallet may support an asset through its official application, a third-party interface, or a specific blockchain account.
Support for one version of a token does not guarantee support for every network on which that token exists.
Before withdrawing, confirm:
- The exact asset
- The blockchain network
- The wallet account type
- Whether the official or compatible wallet interface can display and manage it
- Whether a memo, destination tag, or other identifier is required
Do not rely only on the token ticker.
The same ticker may appear on multiple networks or be used by unrelated tokens.
3. Step-by-Step Safe Withdrawal Process (15 Steps)
Step 1: Open the Correct Account in Your Hardware Wallet App
Open the official wallet application and select the account for the asset you intend to receive.
Examples include:
- A Bitcoin account for native BTC
- An Ethereum account for ETH or compatible Ethereum tokens
- A Solana account for assets issued on Solana
- A Tron account for assets issued on Tron
- A BNB Smart Chain account for assets issued on BNB Smart Chain
The account must correspond to the network you will select on the exchange.
Do not assume that identical-looking addresses mean networks are interchangeable. Some EVM-compatible networks may use the same address format, but the assets still arrive on the network selected by the sender.
The wallet interface must support that network if you want to view and manage the funds safely.
Step 2: Generate a Receiving Address
Select Receive, Deposit, or the equivalent option in the hardware wallet application.
The software should display a receiving address and may ask you to connect and unlock the device.
For supported Ledger workflows, the official process involves opening the relevant blockchain application on the device and displaying the address for verification. Ledger specifically instructs users to compare the address shown in its wallet software with the address displayed on the hardware device.
The address may appear as:
- A long string of letters and numbers
- A QR code
- Both an address and a QR code
Do not send funds yet.
Step 3: Verify the Address on the Hardware Wallet Screen
This is one of the most important steps.
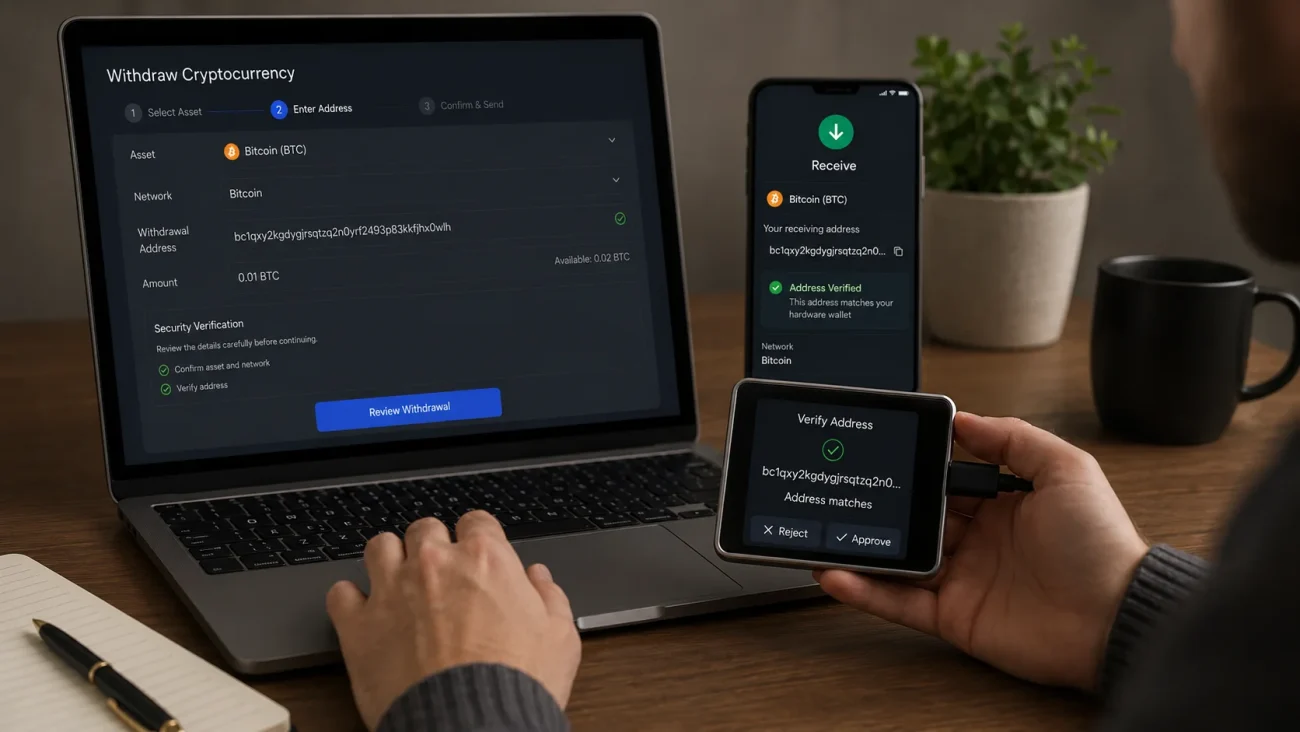
Compare the receiving address shown on the computer or phone with the address shown on the hardware wallet itself.
Check the complete address where practical, not only the first and last few characters.
Why is this necessary?
A compromised computer or smartphone may display an address controlled by an attacker. Clipboard malware can also replace a copied address before it is pasted into the exchange withdrawal form.
The hardware wallet screen is intended to provide an independent confirmation point. Ledger’s official guidance warns that addresses displayed on a compromised computer or smartphone could be manipulated and recommends verifying transaction details on the physical device.
If the two addresses do not match:
- Do not continue.
- Close the wallet application.
- Disconnect the device.
- Check that you installed official software.
- Scan the computer or phone for malware.
- Regenerate and verify the address in a trusted environment.
Never assume the difference is harmless.
Avoid Copying Addresses from Transaction History
Do not copy a receiving address from an old transaction, email, chat conversation, screenshot, or blockchain-history entry.
Address-poisoning attacks attempt to place attacker-controlled addresses in a wallet’s transaction history. These addresses may be designed to resemble one you have previously used. Copying from history without full verification can send funds to the attacker.
Generate a fresh receiving request in the official wallet interface and verify it on the device.
Step 4: Open the Exchange Withdrawal Page
Log in to the exchange using its official website or application.
Navigate to the withdrawal function. Depending on the platform, this may be labeled:
- Withdraw
- Send
- Send Crypto
- On-Chain Withdrawal
- Transfer to External Wallet
Make sure you are selecting an on-chain withdrawal, not an internal transfer to another user on the same exchange.
Before continuing, confirm that your exchange account has appropriate security controls:
- A unique password
- Two-factor authentication or a passkey
- Withdrawal notifications
- Anti-phishing codes, where available
- Address whitelisting, where appropriate
A hardware wallet protects private keys after funds arrive. It does not protect an exchange account that has been compromised before withdrawal.
Step 5: Select the Exact Asset
Choose the cryptocurrency you want to withdraw.
Check the full asset name and ticker.
Be especially careful with:
- Wrapped tokens
- Bridged assets
- Tokens sharing similar names
- Stablecoins issued on multiple blockchains
- Assets with both native and tokenized versions
For example, native BTC is not the same as a token representing Bitcoin on another blockchain.
Similarly, a stablecoin may exist on several networks. The exchange may allow withdrawal over more than one network, but your receiving wallet must support the specific version you choose.
Step 6: Paste or Scan the Verified Receiving Address
Copy the address from the official hardware wallet application after verifying it on the device.
Paste it into the exchange withdrawal field, or scan the QR code if both platforms support that method.
Avoid typing a long crypto address manually. Binance’s withdrawal guidance recommends copying and pasting the address or scanning the QR code rather than entering the address by hand.
After pasting, compare the address again.
Check:
- The beginning
- Several characters in the middle
- The ending
- The total visual structure
- Capitalization where the address format uses it
Do not rely exclusively on the first and last four characters.
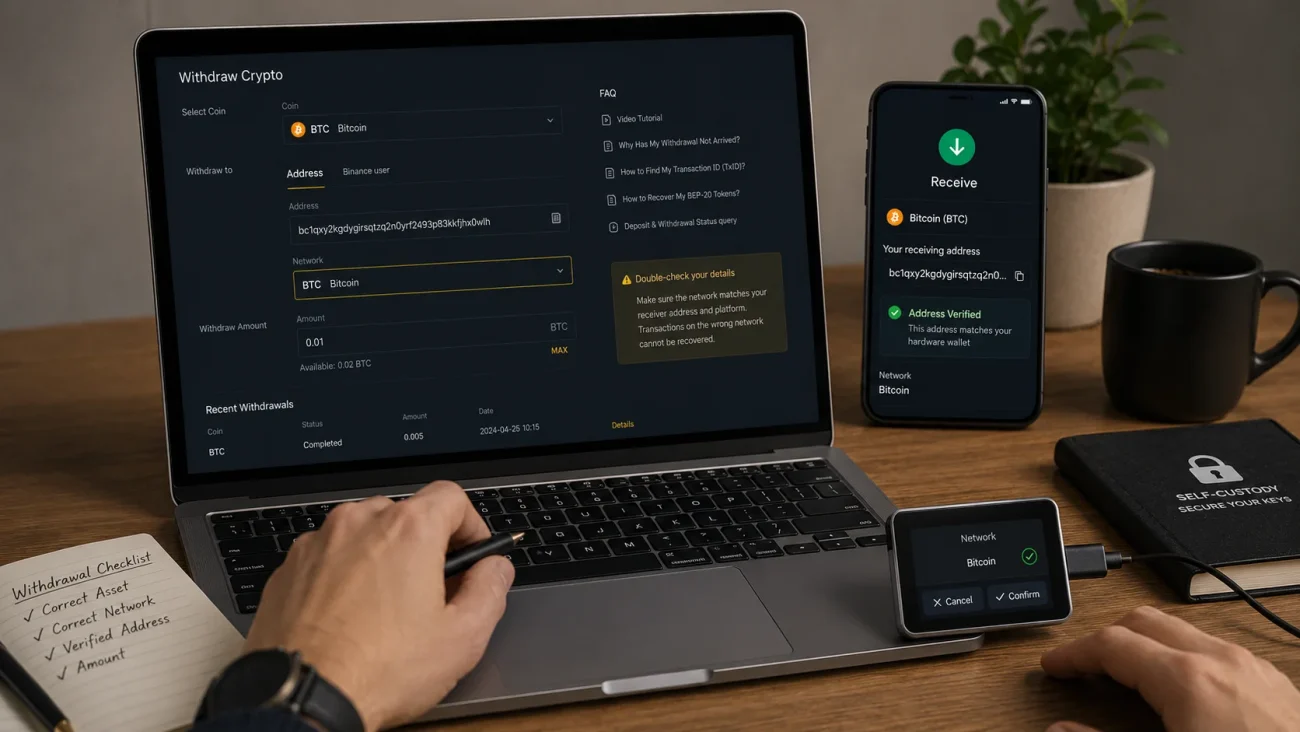
Step 7: Select the Correct Blockchain Network
Network selection is where many withdrawal mistakes occur.
The exchange may offer several networks for the same asset. You must choose the network that matches the receiving account generated by your hardware wallet.
Coinbase instructs users to confirm that the recipient wallet supports the selected network when sending an asset available on multiple networks. Binance similarly warns users to ensure the withdrawal network matches the receiving platform or wallet.
A Safe Network-Matching Process
Before confirming the withdrawal, verify all three items:
- Asset: What are you sending?
- Network: Which blockchain will carry the transaction?
- Receiving account: Is the hardware wallet account configured for that blockchain?
All three must match.
Hypothetical Example: Withdrawing a Stablecoin
Suppose an exchange offers the same stablecoin on several networks.
Your hardware wallet shows an Ethereum account address.
Selecting the Ethereum network may be appropriate if the token is supported in that account. Selecting another network simply because its fee is lower may cause the token to arrive on a network your current wallet interface does not support.
In some cases, recovery may be technically possible using another compatible interface. In other cases, the transfer may be difficult or impossible to recover.
Do not choose a network based only on the lowest fee. Choose it based on verified compatibility.
Step 8: Check Whether a Memo or Destination Tag Is Required
Some blockchains and exchange deposit systems use an additional identifier such as:
- Memo
- Destination tag
- Payment ID
- Message
Whether one is required depends on the receiving setup.
A personal hardware wallet address may not require the same identifier used by an exchange’s shared deposit address. However, you should follow the receive instructions displayed by the wallet software rather than assuming.
If your hardware wallet application does not provide a memo or tag, do not invent one.
If the exchange requires a field that your receiving wallet does not provide, stop and verify compatibility through official documentation.
Step 9: Review Fees and Withdrawal Minimums
Exchanges may charge a withdrawal fee, and blockchain networks require transaction fees to process transfers.
The exchange should show:
- The withdrawal amount
- The withdrawal fee
- The amount expected to arrive
- The selected network
- Any minimum withdrawal requirement
Binance explains that external crypto withdrawals normally incur a transaction or network fee related to processing the blockchain transaction.
Fees can vary by:
- Network congestion
- Exchange policy
- Asset
- Withdrawal route
- Transaction type
A higher fee does not necessarily mean the transfer is safer. A lower fee does not justify using an incompatible network.
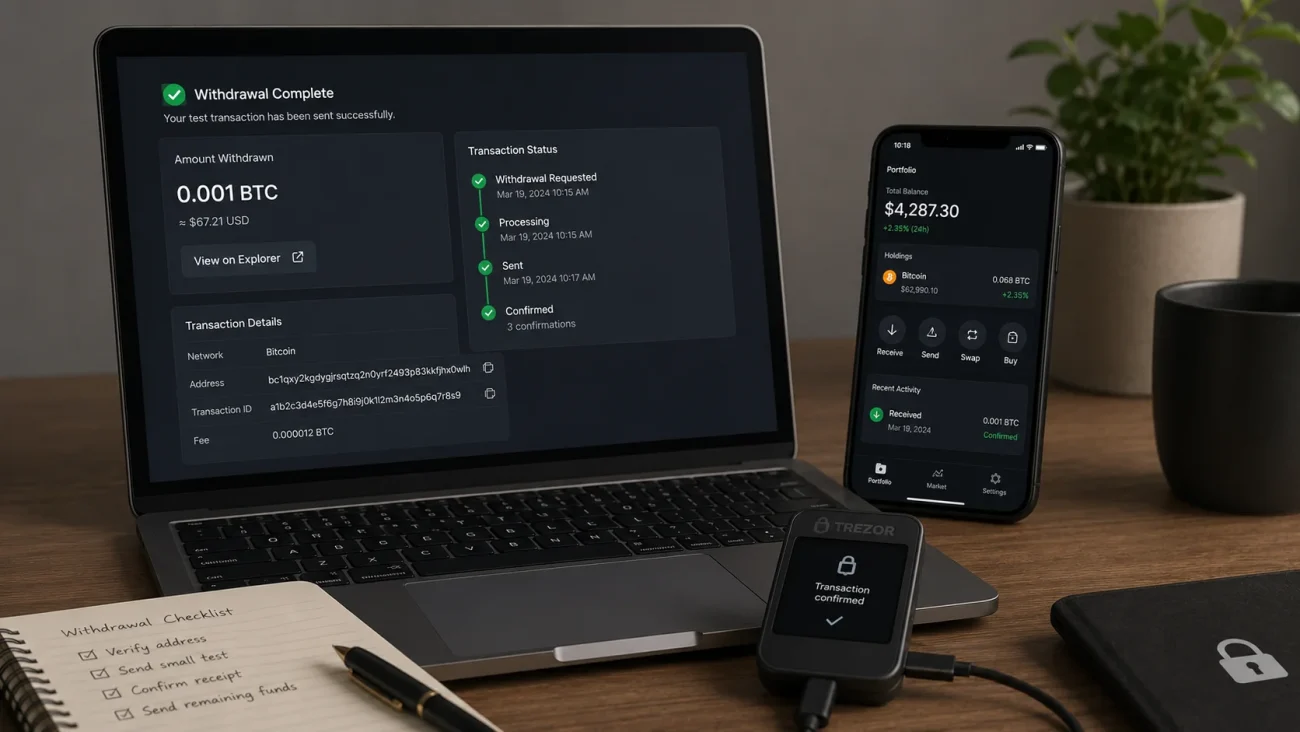
Step 10: Send a Small Test Transaction
For a new wallet, new exchange, new asset, or unfamiliar network, send a small test amount first.
The test should be:
- Large enough to exceed the exchange’s minimum withdrawal
- Large enough to remain meaningful after fees
- Small enough that an error would not create a major loss
A test transfer helps confirm:
- The receiving address is correct
- The selected network is compatible
- The exchange can process the withdrawal
- The wallet application detects the transaction
- You understand the confirmation process
A successful test does not prove that every future transaction is safe. You must still verify the address and network each time.
Do not reuse an address from the test merely because it worked previously without checking it again in the hardware wallet application.
Step 11: Complete the Exchange Security Confirmation
The exchange may require one or more security steps:
- Email confirmation
- Authenticator code
- Passkey
- SMS verification
- Withdrawal whitelist approval
- Risk review
- Wallet-ownership verification
Read the confirmation page carefully.
Verify:
- Asset
- Amount
- Address
- Network
- Fee
- Final receiving amount
Do not approve a withdrawal initiated by someone else or one that appeared unexpectedly.
No legitimate hardware wallet support agent needs to remotely control your screen or ask for your recovery phrase to complete a withdrawal.
Step 12: Wait for the Test Transaction to Confirm
After the exchange processes the withdrawal, it should provide a transaction ID, also called:
- Transaction hash
- TxID
- Transaction identifier
You can use the transaction ID to view the transfer on the appropriate blockchain explorer.
A withdrawal may pass through several stages:
- Exchange security review
- Exchange processing
- Broadcast to the blockchain
- Inclusion in a block
- Additional network confirmations
- Display in the wallet application
Do not panic if the wallet balance does not update immediately.
Check:
- Whether the exchange marked the transaction as completed
- Whether a TxID has been issued
- Whether the correct blockchain explorer shows the transaction
- Whether the wallet application is synchronized
- Whether the correct account and network are selected
- Whether the token needs to be added manually to the wallet interface
Do not share your recovery phrase with anyone offering to “synchronize,” “validate,” or “unlock” the transaction.
Step 13: Verify the Funds in Your Wallet
Once the test transaction confirms, open the hardware wallet application and verify:
- The correct asset appears
- The expected amount arrived after fees
- The correct blockchain account received it
- The transaction is visible in the account history
- The receiving address belongs to the wallet
For token transfers, you may need to add the token’s contract information or use a compatible interface to display it.
Only use contract addresses obtained from official project documentation or reputable blockchain explorers. Trezor advises verifying token authenticity by checking the contract address against official project information.
A token not appearing in the default interface does not automatically mean the transfer failed.
Confirm the on-chain transaction before taking further action.
Step 14: Transfer the Remaining Balance
After the test transfer has been confirmed and displayed correctly, repeat the process for the remaining amount.
Do not skip the checks simply because the first transfer succeeded.
Generate or confirm the receiving address again, verify it on the hardware device, select the same supported network, and review the withdrawal details.
For a particularly large balance, consider dividing the transfer into more than one transaction.
This can reduce the impact of an operational mistake, although it may result in additional withdrawal or network fees.
The appropriate transfer size depends on:
- The value being moved
- Withdrawal fees
- Network conditions
- Your experience
- Exchange withdrawal limits
- Your tolerance for operational risk
This is a security decision, not an investment decision.
Step 15: Confirm Self-Custody Is Complete
After the full transfer:
- Confirm the exchange balance has been reduced by the expected amount.
- Confirm the hardware wallet account shows the expected balance.
- Check the final transaction on a trusted block explorer.
- Confirm the recovery phrase remains secure.
- Disconnect and store the hardware wallet safely.
- Keep the hardware wallet separate from its recovery backup.
- Record any operational notes without recording the recovery phrase digitally.
You do not need to keep the device connected for the assets to remain associated with the wallet.
4. Common Mistakes to Avoid
Choosing the Cheapest Network Without Checking Compatibility
A low-fee network is not useful if the receiving wallet cannot manage the asset on that network. Compatibility comes before cost.
Sending the Full Balance as the First Transaction
A small test withdrawal can reveal address, network, and account problems before a larger amount is exposed.
Verifying Only the First and Last Characters
Attackers can create addresses that resemble legitimate ones. Compare as much of the address as possible and confirm it on the hardware wallet screen.
Copying an Address from Transaction History
Transaction histories can contain address-poisoning entries. Generate the receiving address through the official wallet application instead.
Entering the Recovery Phrase to “Connect” the Wallet
Receiving crypto requires only a public receiving address. A website, exchange, or support agent asking for the recovery phrase is not completing a normal withdrawal process.
Confusing a Token with Its Native Blockchain Asset
A token can exist on a network without being that network’s native asset.
For example, receiving a token may require the same account address as the native asset, but spending it later may also require the network’s native coin to pay transaction fees.
Assuming the Hardware Wallet Screen Is Optional
The computer or phone may be compromised. On-device verification is one of the core protections a screen-based hardware wallet provides.
Forgetting About Withdrawal Limits or Security Holds
Exchanges may delay withdrawals after password changes, security-setting updates, new address additions, or unusual account activity.
Review the exchange’s current policies before planning a time-sensitive transfer.
5. Frequently Asked Questions About Transfers
Should You Reuse the Same Receiving Address?
The answer depends on the blockchain and your privacy preferences.
Some account-based networks commonly use the same account address repeatedly.
Bitcoin wallets often generate a new receiving address for each transaction to improve privacy. Ledger notes that Bitcoin and several Bitcoin-based assets may display a new receiving address after each transaction, while account-based assets such as Ethereum commonly retain the same address.
Previously generated Bitcoin addresses generally remain associated with the wallet, but using a newly generated address can reduce address reuse and improve transaction privacy.
Always generate and verify the address through the official wallet interface.
Can You Transfer Crypto While the Hardware Wallet Is Offline?
Yes.
The hardware wallet does not need to be connected when the exchange broadcasts the transaction.
The receiving address already exists on the blockchain. The device is needed to generate and verify the address securely and later authorize outgoing transactions.
You can also monitor a public address through a watch-only wallet or blockchain explorer without exposing the private keys.
What If You Select the Wrong Network?
Stop and document the transaction details.
Collect:
- Asset name
- Amount
- Sending exchange
- Selected network
- Receiving address
- Transaction ID
- Hardware wallet model
- Wallet application used
Do not enter your recovery phrase into an online recovery service.
Whether funds can be recovered depends on the relationship between the selected network and the receiving address. Some cross-network mistakes may be recoverable with a compatible wallet interface. Others may require exchange assistance or may not be recoverable.
Contact the exchange and hardware wallet manufacturer through verified support channels. They may explain the technical options, but legitimate support will not request your recovery phrase or private keys.
What If the Withdrawal Is Completed but the Balance Is Missing?
Work through the following checklist:
- Confirm the exchange provided a transaction ID.
- Open the correct blockchain explorer.
- Confirm the transaction status.
- Verify the destination address.
- Verify the selected network.
- Open the correct account in the wallet application.
- Allow the application to synchronize.
- Check whether the token must be added manually.
- Confirm the wallet interface supports that network.
- Check whether the exchange sent a wrapped or bridged version of the asset.
If the explorer shows the correct address and a successful transaction, the assets may be present on-chain even if the current interface is not displaying them.
Do not reset the wallet or expose the recovery phrase while troubleshooting.
How long does it take to transfer crypto from an exchange to a hardware wallet?
The total time depends on the exchange’s processing procedures, the selected blockchain, network congestion, and the number of confirmations required.
A withdrawal can remain pending at the exchange before it is broadcast. Once a transaction ID is available, you can monitor its blockchain status.
Do I need to connect my hardware wallet to receive crypto?
No.
The hardware wallet is normally connected when generating and verifying the receiving address. The blockchain can receive the transaction while the device is disconnected.
Does transferring crypto to a hardware wallet create a taxable event?
Tax treatment varies by country and individual circumstances.
Moving an asset between accounts or wallets you control may be treated differently from selling or exchanging it, but this article does not provide tax advice. Consult a qualified professional familiar with the rules applicable to you.
Should I always send a test transaction?
A test transaction is strongly advisable when using a new address, wallet, exchange, asset, or network.
For very small balances, the extra withdrawal fee may be significant. The decision should still be based on operational risk rather than convenience alone.
Can I send USDT directly to a hardware wallet?
A hardware wallet may manage USDT on one or more supported networks, but you must confirm the exact network and compatible wallet account before withdrawing.
“USDT” alone is not enough information. Verify the token, network, receiving address, and wallet support.
Can an exchange reverse a crypto withdrawal?
Once an on-chain transaction has been confirmed, exchanges generally cannot reverse it in the way a card payment might be reversed.
Contact the exchange immediately if a withdrawal is still pending or has not yet been broadcast.
Why did my Bitcoin receiving address change?
Bitcoin wallets commonly generate a new receiving address to improve privacy.
Ledger’s official support documentation states that Bitcoin and some Bitcoin-based assets may display a different address after a previous receipt. Earlier addresses can remain associated with the same wallet, but the newly displayed address should still be verified on the device.
Is it safe to save my hardware-wallet address in an exchange address book?
It can improve convenience and reduce manual copying, especially when combined with withdrawal whitelisting.
However, verify the saved address against your hardware wallet before relying on it for a significant transfer. Account compromise, incorrect labels, and earlier setup mistakes remain possible.
Will my crypto disappear if the hardware wallet breaks?
The assets remain on the blockchain.
If the recovery phrase and any additional passphrase are correct and secure, the wallet can usually be restored on a compatible replacement device.
6. Additional Long-Term Security Practices for Regular Withdrawals
Use an Address Whitelist
Some exchanges allow users to restrict withdrawals to previously approved addresses.
An address whitelist can reduce the risk of unauthorized withdrawals to a new destination, although it does not replace device verification.
Coinbase Exchange provides address-book and withdrawal-whitelisting functionality for approved crypto addresses.
Maintain a Dedicated Transfer Device
For significant self-custody operations, consider using a clean, updated computer or phone with:
- Minimal software
- No unnecessary browser extensions
- Current operating-system security updates
- Official wallet applications
- No pirated software
This does not make the device immune to compromise, but it can reduce exposure.
Keep Exchange and Wallet Security Separate
Do not store the following together:
- Exchange password
- Authenticator backup
- Hardware wallet
- Recovery phrase
- Custom passphrase
- Withdrawal-address records
A single theft or account compromise should not expose every security layer.
Create an Emergency Recovery Plan
Document how to respond if:
- The hardware wallet is lost
- The device stops working
- The exchange freezes a withdrawal
- The receiving address does not match
- A test transaction fails
- The recovery phrase is damaged
- You suspect the recovery phrase was exposed
Do not include the recovery words in the general emergency instructions.
For users building a long-term self-custody system, add an internal link here to your Long-Term Cold Storage Guide.
You can also link to your Crypto Self-Custody Security Checklist and the Ledger Nano X hardware wallet product page as a relevant product option for readers comparing mobile and desktop hardware-wallet workflows.
7. Exchange VS Hardware Wallet: Different Risk Models
Keeping crypto on an exchange means the exchange or its custody partners generally control the private keys associated with the customer’s account balance.
The user depends on the platform’s:
- Security
- Withdrawal systems
- Solvency
- Internal controls
- Regulatory access
- Account-recovery process
- Operational availability
A hardware wallet changes that arrangement by placing transaction authorization under the user’s control.
However, self-custody introduces different responsibilities:
- Recovery phrase security
- Correct network selection
- Address verification
- Physical backup protection
- Inheritance planning
- Safe transaction signing
- Protection from phishing and coercion
Neither custody model removes market risk.
A hardware wallet cannot prevent an asset’s price from falling. Its purpose is to help isolate private keys and give the owner direct control over transaction approval.
8. Printable Safe Transfer Checklist
Before withdrawing:
- Hardware wallet initialized by you
- Official wallet application installed
- Recovery phrase backed up offline
- Correct asset account added
- Receiving network confirmed
- Receiving address displayed on the device
- Exchange account secured with strong authentication
During the withdrawal:
- Correct asset selected
- Correct network selected
- Verified address pasted or scanned
- Address checked again after pasting
- Memo or tag instructions reviewed
- Fees and final receiving amount checked
- Small test amount selected
- Exchange confirmation reviewed carefully
After the withdrawal:
- Transaction ID obtained
- Transaction checked on the correct block explorer
- Test amount displayed in the wallet
- Remaining balance transferred only after confirmation
- Final balance verified
- Hardware wallet and recovery phrase stored separately
- Recovery phrase never entered online
9. Final Thoughts
Transferring crypto from an exchange to a hardware wallet is straightforward when the process is treated as a security procedure rather than a routine copy-and-paste task.
The safest sequence is:
- Initialize the hardware wallet yourself.
- Secure the recovery phrase offline.
- Confirm support for the asset and network.
- Generate a receiving address.
- Verify the full address on the hardware wallet.
- Select the matching withdrawal network.
- Send a small test transaction.
- Verify it on-chain and in the wallet.
- Transfer the remaining balance only after the test succeeds.
Most serious withdrawal mistakes happen when one of these checks is skipped.
Take your time. Verify every address. Match the network exactly. Never disclose the recovery phrase.
In self-custody, the goal is not to move faster.
It is to make every critical action deliberate, verifiable, and recoverable.
10. Security Disclaimer
This article is for general educational purposes only. It does not constitute financial, investment, legal, accounting, or tax advice.
Crypto transactions may be irreversible, and incorrect addresses, unsupported networks, compromised devices, phishing, exchange failures, or loss of recovery information can result in permanent loss.
Hardware wallets can reduce certain private-key and online-custody risks, but they do not eliminate market volatility, malicious smart contracts, supply-chain risk, physical theft, coercion, or user error.
CryptoSafeKit will never ask for your recovery phrase, private key, PIN, wallet password, or custom passphrase through a website, email, chat, support form, or cloud service.